Structural integrity goes beyond what the eye can see. That’s why industries that build, weld, and maintain essential infrastructure need ultrasonic flaw detectors.
This advanced testing tool uses high-frequency sound waves. It finds hidden cracks, voids, and internal flaws in materials. This way, it becomes possible to identify weaknesses long before they turn into costly failures.
However, that doesn’t mean every ultrasonic flaw detector you find is the right fit.
At Kleinschmidt Surveying, we have provided top NDT equipment for over twenty years. We know that precision relies on having the right tool.
That’s why we’ve compiled this article comparing ultrasonic flaw detectors. This text lists the best ultrasonic flaw detectors for 2026. It compares their technology, performance, and value. This way, you can make a confident choice.
What Is an Ultrasonic Flaw Detector?
An Ultrasonic Flaw Detector is a non-destructive testing (NDT) tool. It uses high-frequency sound waves to find and assess defects in solid materials.
When a sound pulse enters the test object, part of it reflects off boundaries such as cracks, voids, or thickness changes. These reflections show up on the screen as echoes. This helps inspectors accurately determine the flaw’s position and size.
Ultrasonic testing differs from radiographic and eddy-current testing. Radiographic testing uses X-rays. Eddy-current testing measures electrical conductivity.
In contrast, ultrasonic testing works like a precise sonar for solid materials. It penetrates deeply beneath the surface, delivers instant results, and avoids damaging the material you examine.
How Does an Ultrasonic Flaw Detectors Work?
An ultrasonic inspection device works on the pulse-echo principle. It sends sound waves into a material. Then it analyzes returning echoes to detect hidden flaws. Learn more below.

Pulse Generation and Transmission
The device’s transducer sends out short, high-frequency sound pulses. These pulses usually range from 0.5 to 10 MHz. They go into the material being tested. These waves travel through the object until they encounter a boundary, such as a crack, void, or change in thickness.
Reflection and Detection
When sound waves encounter a discontinuity, some of the energy is reflected toward the transducer. The detector’s receiver and display unit change these reflections into visual signals. These signals often show up as peaks or patterns on a graph.
Signal Interpretation
Each echo represents a boundary or flaw within the test piece. Inspectors can determine the exact location and depth of a defect by measuring the time it takes for the echo to return.
Display Modes
Modern NDT flaw detector displays results in multiple formats for clarity and precision:
- A-Scan: A one-dimensional waveform showing amplitude versus time; ideal for pinpointing flaw depth.
- B-Scan: A cross-sectional image displaying a slice view of the component.
- C-Scan: A top-down image map showing the area and size of defects.
Factors for Selecting the Best Ultrasonic Flaw Detectors
Choosing the right NDT flaw detector requires more than comparing brand names or prices. Each application usually demands specific performance parameters. Below are the key factors to consider when selecting the most suitable system for your work.
Frequency Range
The frequency of the ultrasonic pulse affects how deep it enters the material. It also decides how small a flaw it can find.
- Higher frequencies (5–10 MHz): Provide fine detail and are ideal for thin materials or small cracks.
- Lower frequencies (0.5–2 MHz): Offer greater penetration for thick or coarse-grained components such as castings or forgings.
Display Modes
Select a detector that provides the display views you need for your inspections.
- A-Scan: Standard waveform view for depth measurement.
- B-Scan: Cross-sectional imaging for weld and pipeline testing.
- C-Scan or Phased Array Views: For advanced visualization and reporting on large surfaces or complex geometries.
Portability and Durability
Field inspection environments can be demanding. Look for:
- Lightweight designs that reduce operator fatigue.
- IP-rated enclosures for dust, moisture, and temperature resistance.
- Long battery life (8–12 hours minimum) for extended shifts or remote sites.
Data Storage and Connectivity
Efficient data handling saves time during reporting and audits. Modern units offer:
- USB or SD card storage for offline transfer.
- Wi-Fi or cloud connectivity for instant data sharing and remote review.
- Software integration for traceable inspection records and analysis.
Software Compatibility and Imaging Tools
Advanced instruments support 3D imaging, report generation, and automated defect detection. These tools not only improve productivity but also ensure consistent results across teams.
Compliance and Calibration
Always ensure the detector complies with recognized standards such as ASTM E317, EN 12668-1, or ISO 22232. Factory calibration and certification ensure measurement accuracy and regulatory acceptance.
Always choose a model that fits your inspection environment, material type, and defect profile. A system optimized for weld inspection may not deliver the same precision in corrosion or composite testing applications.
Top 5 Ultrasonic Flaw Detectors of 2026
1. Olympus OmniScan X4 – Phased Array Ultrasonic Flaw Detectors
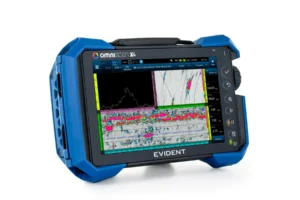
The Olympus OmniScan X4 represents the next generation of Olympus phased-array ultrasonic flaw detection — now Evident. This advanced technology combines Phased Array (PAUT), Total Focusing Method (TFM), and Phase Coherence Imaging (PCI) into one system. This makes it one of the most versatile and smart inspection tools available today.
The OmniScan X4 is faster than the X3. It processes TFM up to three times quicker.
The X4 also offers sharper images and smarter automation for easier workflows. It also has a larger 1 TB solid-state drive, a fast processor, and the MXU 6 software. This software makes complex scan setups easier with guided 3D visualization and real-time orientation correction.
Key Features
- Multi-technology platform supporting PAUT, TFM, PCI, and PWI for full flaw characterization
- PCI and TFM deliver high-resolution imaging — up to 3× faster than the X3
- Twin TFM/PCI enables dual-sided weld inspection in one scan
- Application presets (HydroFORM™, RollerFORM™, FlexoFORM™) ensure consistent setup in minutes
- MXU 6 software provides step-by-step 3D scan planning and orientation correction
- 1 TB SSD, wide 5–160 Vpp pulse range, and API connectivity support long jobs and easy integration
Pros
- Exceptional imaging clarity with TFM and PCI
- Fast setup and intuitive interface for complex geometries
- Integration-ready and future-proof via quarterly MXU updates
Cons
- Premium price and advanced modes best suited for trained operators
- Larger size than compact field units
Ideal For
Advanced industrial, aerospace, and energy inspections where precision, speed, and detailed reporting are critical.
2. Olympus OmniScan X3 – Phased Array Ultrasonic System
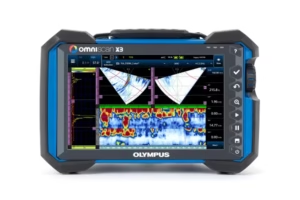
The OmniScan X3 may not have all the digital features of the newer X4. Still a trusted flaw detector. It uses phased array ultrasonic (PAUT) technology. This device is used for industrial and field inspections.
With its advanced Total Focusing Method (TFM) imaging, it connects old MX2 systems to the new X4 generation. This offers great detection accuracy, strong hardware, and proven reliability in tough environments.
One of its standout strengths is its design for heavy-duty field applications. With live TFM imaging, inspectors can achieve a grid resolution of 1,024 × 1,024. This allows them to capture highly detailed images of defects such as cracks, inclusions, or lack of fusion.
The X3 can detect high-temperature hydrogen attack (HTHA) and stepwise cracking. This makes it essential for energy and petrochemical inspections. Early detection helps prevent serious failures.
Key Features
- Phased Array + TFM capabilities for accurate flaw imaging and sizing
- Live TFM with 1,024 × 1,024 grid resolution and a vibrant color display
- Acoustic Influence Map (AIM) models real-time scan sensitivity and coverage
- Supports up to four TFM modes for multi-angle flaw interpretation
- 3× faster PRF than MX2 with improved calibration and data workflow
- Compatible with Dual Linear/Matrix Array probes and legacy MX/MX2/SX setups
- 25 GB file capacity, IP65 protection, and Evident Connect cloud updates
Pros
- Exceptional TFM imaging detail and coverage visualization
- Backward-compatible with existing Olympus hardware and data
- Rugged, weatherproof design proven for heavy industrial use
Cons
- Slightly heavier and less automated than the X4
- Lacks API-level integration for remote control or data streaming
Ideal For
Pipeline welds, pressure vessels, and heavy industrial inspections requiring durable phased array performance and seamless compatibility with existing Olympus systems.
3. Waygate USM 100 – Portable Ultrasonic Flaw Detectors
The Waygate USM 100 redefines modern flaw detection through a digital-native design. It is a portable ultrasonic flaw detectors. It combines easy smartphone-like use with strong durability for the field. This is thanks to its advanced touchscreen and IP67-rated design.
In the field, the USM 100 feels built for inspectors who move fast and work hard. It features a 7-inch glove-compatible touchscreen, IP67 protection, and ambidextrous controls for comfort during extended inspections.
The Mentor App ecosystem powers the software. This allows operators to customize workflows, do guided inspections, and sync data quickly using Wi-Fi.

Key Features
- Digital-native flaw detector with smartphone-style interface, app integration, and remote updates
- 7″ glove-compatible touchscreen, IP67 housing, and drop-tested field durability
- Mentor App ecosystem for guided workflows, calibration, and data sharing
- Cloud-based data management and remote calibration for real-time access and uptime
- Advanced data recorder with A-scan capture and grid-based post-processing
- Supports DAC/TCG, DGS, AWS, and IF Gate for precise TOF tracking
Pros
- Intuitive, app-driven interface with minimal training curve
- Lightweight, ergonomic design ideal for one-hand field use
- Seamless cloud and PC integration for live collaboration
Cons
- Premium pricing and reliance on software connectivity for full features
- Touchscreen operation may require care in oily or wet conditions
Ideal For
Field inspectors, weld testers, and corrosion specialists who need digital connectivity, quick calibration, and reliable performance across automotive, shipbuilding, and rail environments.
4. Waygate Krautkrämer USM 36 – Versatile Ultrasonic Flaw Detector
The Krautkrämer USM 36 is a versatile ultrasonic flaw detector. It is designed to work well in many industrial applications. This model mixes modern digital design with the strong build of the classic Krautkrämer line. It provides reliable performance every day, even in tough conditions.
Its large 7-inch high-resolution display is the biggest in its class. It offers clear A-scan visibility, even in bright sunlight. The simple 6-key interface and dual rotary knobs allow for quick control during use.
This ultrasonic flaw detector is made for durability. It has an IP66 protection rating.
It works in temperatures from –10°C to +55°C. The Li-ion battery lasts for 13 hours. This allows for long inspection shifts without breaks.

Key Features
- 7″ high-contrast display (800×480 px) — largest A-scan view in its class
- 6-key keyboard + rotary knobs for fast, precise adjustments
- Compatible with USM Go/Go+ setups for seamless data transfer
- Flexible reporting: screenshots, A-scan video, and JPEG/BMP exports via SD or USB
- Rugged IP66 build, –10 °C to +55 °C operating range, 13-hour battery life
- DAC, AWS, DGS modes, with trueDGS™ and Phantom Echo Detection for accurate flaw sizing
Pros
- Bright, large display for effortless signal interpretation
- Simple, reliable controls with minimal training required
- Proven durability and long runtime for field or workshop use
Cons
- Heavier and less portable than newer touchscreen models
- Lacks app or cloud integration
Ideal For
Fabrication shops, maintenance teams, and general NDT groups need a reliable and easy-to-use flaw detector. This tool is for weld inspection, corrosion measurement, and thickness testing.
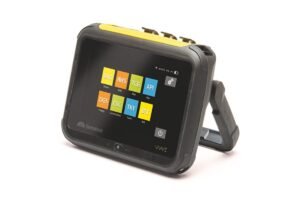
5. Sonatest WAVE – Interactive Ultrasonic Flaw Detector
The Sonatest WAVE blends touchscreen simplicity, intelligent scan planning, and customizable workflows to deliver unmatched inspection speed and clarity. The WAVE UTouch Technology in Sonatest WAVE features a smart touchscreen. It can distinguish between a couplant film and a finger touch. This ensures precise control and uninterrupted operation even in wet or demanding industrial conditions.
Unlike traditional UT instruments with rigid interfaces, the WAVE lets each inspector tailor the workflow to their process. Operators can hide unused menus, lock key parameters, and access critical settings in just a few taps.
This custom interface saves time during setup. It reduces human errors. It also helps the operator concentrate on data quality rather than navigation.
Key Features
- Interactive Scan Plan with real-time ray tracing and geometry simulation
- Customizable interface with movable and lockable tiles for tailored workflows
- UTouch Technology — rugged touchscreen that works with gloves and couplant
- WAVE Companion software for remote data management and updates
- Wi-Fi connectivity and CAD import for quick setup on complex geometries
- Application Concept interface simplifies operation and reduces training time
Pros
- Intuitive touchscreen minimizes setup time and operator error
- Interactive visualization tools reduce false calls and speed decisions
- Fully connected system with PC and cloud integration
Cons
- Touchscreen control may be less ideal in harsh or contaminated environments.
- Fewer physical buttons than traditional instruments
Ideal For
Field technicians and QA teams in aerospace, automotive, oil & gas, and manufacturing who need a smart, connected NDT flaw detector with fast setup, powerful visualization, and flexible workflows.
Quick Comparison Table – Best Ultrasonic Flaw Detectors 2026
|
Model |
Technology |
Display Type |
Weight |
Best For |
Key Strength |
|
Olympus OmniScan X4 |
Phased Array (PAUT), TFM, PCI, PWI |
10.6″ TFT touchscreen (1280 × 768) |
5.7–5.9 kg(varies by model) |
Aerospace / Energy / Advanced Industrial |
Fastest TFM imaging, integrated PCI & 3D scan planning |
|
Olympus OmniScan X3 |
Phased Array + TOFD + TFM |
Color display with 1,024 × 1,024 grid |
Approx. 4.5 kg (est.) |
Pipeline / Pressure Vessel / Heavy Industry |
Multi-mode flaw detection with live TFM and AIM coverage tool |
|
Waygate Krautkrämer USM 100 |
Conventional UT (digital-native) |
7″ high-brightness touchscreen |
1.2 kg (incl. batteries) |
Field Inspection / Automotive / Shipbuilding / Rail |
App-based workflows + cloud connectivity for real-time collaboration |
|
Waygate Krautkrämer USM 36 |
Conventional UT |
7″ high-contrast display (800 × 480) |
2.2 kg |
Workshop / Maintenance / Fabrication Shops |
Rugged workhorse with trueDGS™ and Phantom Echo Detection |
|
Sonatest WAVE |
Conventional UT with interactive software |
7″ touchscreen (1024 × 600) |
1.7 kg |
Aerospace / Automotive / Oil & Gas / Manufacturing |
Customizable interface + Interactive Scan Plan with ray tracing |
Advantages & Disadvantages of Ultrasonic Testing Equipment
Ultrasonic testing equipment is one of the most popular non-destructive testing methods in industry today. Like any technology, it has both advantages and disadvantages.
Advantages
Non-destructive and safe: Inspections cause no damage to components, preserving asset integrity and allowing repeated evaluation over time.
- High precision and depth: UT can detect both surface and subsurface flaws, providing accurate sizing and defect characterization.
- Instant feedback and digital recording: Real-time results enable quick decision-making, while integrated software and imaging systems simplify documentation and traceability.
- Portable and rugged: Modern flaw detectors are lightweight and durable, making them ideal for field inspections in demanding environments.
- Versatile material compatibility: Equally effective on metals, welds, composites, and dense engineering materials where other NDT methods may struggle.
Disadvantages
- Operator-dependent accuracy: Effective signal interpretation requires trained, experienced personnel to distinguish true defects from geometric echoes.
- Surface preparation required: Rough, dirty, or uneven surfaces can interfere with coupling and reduce test reliability.
- Couplant requirement: You must use a liquid or gel between the transducer and test surface. This helps transmit ultrasonic energy effectively.
Key Industries Using Ultrasonic Flaw Detectors
Ultrasonic flaw detectors are essential across industries where structural integrity, safety, and compliance cannot be compromised. The table below highlights key industries and their common applications.
|
Industry |
Application |
|
Construction & Welding |
Crack and void detection in welded joints, ensuring strength and durability of load-bearing structures |
|
Aerospace & Automotive |
Component integrity verification, composite testing, and detection of delamination or bonding flaws |
|
Oil & Gas |
Pipeline weld inspection, corrosion mapping, and in-service flaw monitoring to prevent leaks and structural failure |
|
Manufacturing |
Quality assurance testing of machined parts, castings, and assemblies to detect inclusions or discontinuities |
|
Shipbuilding & Rail |
Weld seam inspection and structural integrity assessment for vessels, rails, and rolling stock components |
Buying Guide – Choosing the Right Ultrasonic Flaw Detectors
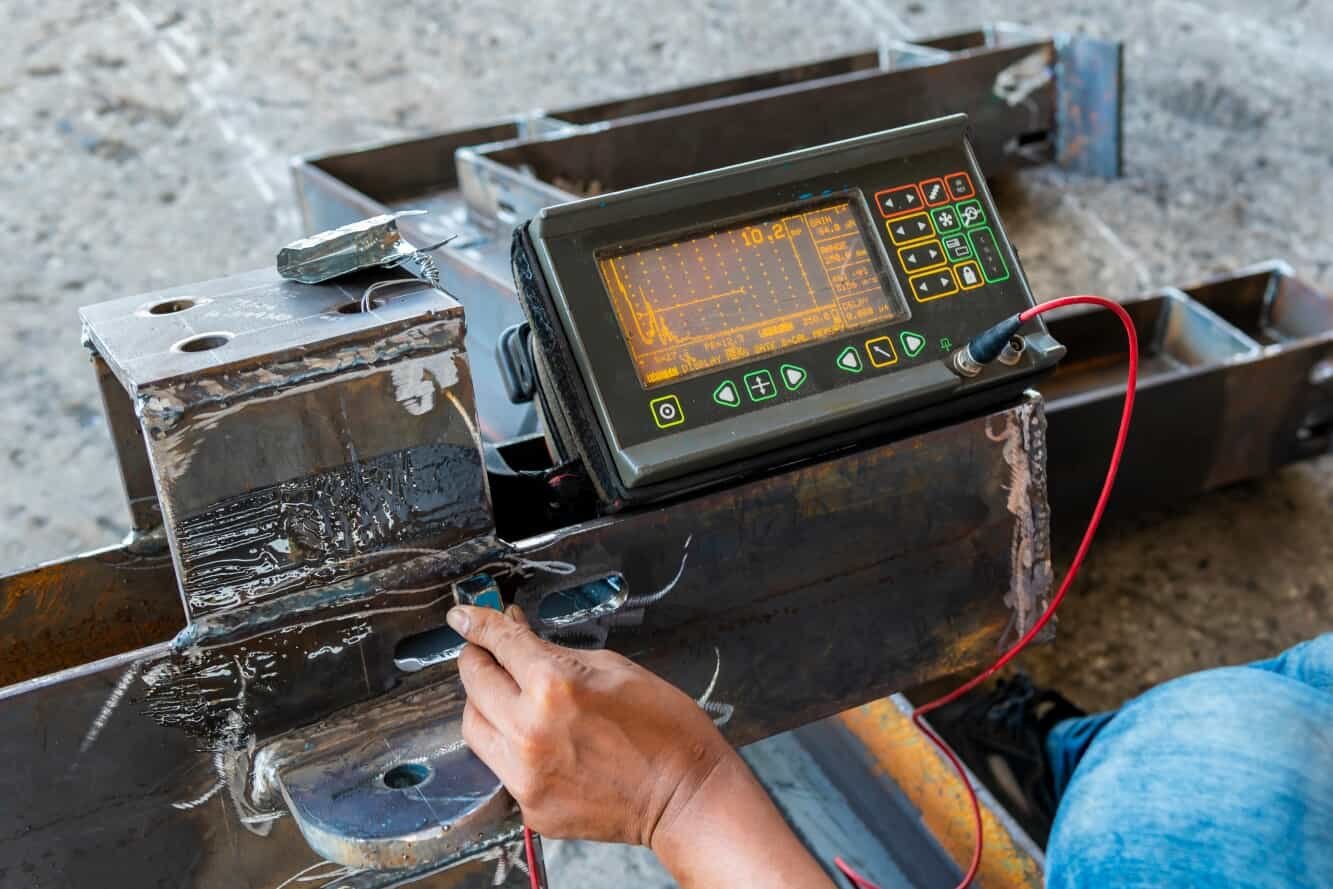
If you’re trying to buy an ultrasonic flaw detector, the right ultrasonic flaw detector goes beyond comparing specifications. The ideal unit should meet your inspection needs. It should also fit your workflow, your operator’s skills, and your compliance standards. Here are key factors to consider before making your purchase.
Match Frequency and Power Output to Material Type
Different materials require specific frequency ranges and pulse power levels for accurate flaw detection.
- High frequencies (5–10 MHz) suit thin materials and fine-grain metals.
- Low frequencies (0.5–2 MHz) penetrate thicker or coarse-grain components such as castings or composites.
Matching the system’s transducer capability to the material ensures consistent signal clarity and reliable depth sizing.
Check for Compliance and Certifications
Always verify that the instrument meets recognized standards such as ASTM E317, ISO 22232, or EN 12668. Certified systems guarantee consistent performance, expedite audit approval, and ensure compliance with regulated inspection procedures.
Evaluate Display Visibility in Field Conditions
Screen readability is critical, especially during outdoor or high-glare inspections. Opt for models with high-contrast color displays or sunlight-readable touchscreens to minimize interpretation errors and operator fatigue.
Prioritize Battery Life and Data Management
Choose instruments with long battery life (10 hours or more) and easy data export options, such as USB, SD card, or wireless transfer. Efficient power and file handling reduce downtime during large or remote inspections.
Choose Reliable Support and Calibration Services
Partner with a supplier that offers factory calibration, technical training, and local after-sales support. This ensures accuracy, regulatory compliance, and faster turnaround when servicing or updating equipment.
At Kleinschmidt Surveying, we provide and service top ultrasonic flaw detectors. This includes systems from Olympus, Waygate, and Sonatest. We also offer full calibration, certified training, and ongoing technical support.
Contact us today to request a personalized quote or schedule a live demo and experience precision testing made simple.
Frequently Asked Questions (FAQs)
What is an ultrasonic flaw detector used for?
Technicians use ultrasonic flaw detectors to detect cracks, voids, inclusions, and other discontinuities in materials. They send high-frequency sound waves. Then they study the echoes that return. This helps them check the structure’s safety and accuracy.
How accurate is ultrasonic flaw detection?
Modern ultrasonic systems, such as phased-array and TFM-based models, can detect flaws as small as 0.1 mm. This depends on the transducer frequency, coupling quality, and surface condition. Accuracy also depends on operator skill and calibration standards.
Can ultrasonic testing be used on all materials?
UT is most effective on metals, dense composites, and solid plastics. While this method can be used on ceramics or hard plastics, rough or uneven surfaces can scatter signals. This means we may need to use other NDT methods as well.
What industries rely most on ultrasonic flaw detectors?
Ultrasonic testing is used in many fields. These include oil and gas, aerospace, construction, power generation, manufacturing, shipbuilding, and automotive. It is important for ensuring component reliability and safety.
What is ultrasonic flaw detection?
Ultrasonic flaw detection is a non-destructive testing (NDT) method. It uses high-frequency sound waves to detect defects in materials, both on the surface and within the material. Reflected echoes from cracks or gaps show up as signals on the screen. This helps inspectors find and measure flaws without harming the part.
Why Buy from Kleinschmidt Surveying
When precision and reliability matter, partnering with an experienced NDT supplier makes all the difference. Kleinschmidt Surveying has been a trusted name in non-destructive testing for over twenty years. They offer certified tools, expert help, and great customer support.
Why professionals choose us:
- Trusted NDT supplier since 2001
- Authorized partnerships with Olympus, Waygate, Sonatest, and Fluke
- Factory-calibrated instruments with full manufacturer’s warranty
- Competitive pricing with expert technical and after-sales support
- Fast shipping across Asia and to clients worldwide
If you want to buy an ultrasonic flaw detector, order today. Enjoy free shipping and calibration help on some models. Available this month only.


Comment (1)